The first time I pointed a camera at a nudibranch, I got a blurry blue rectangle. The nudibranch was somewhere in there, probably. What I got was nothing but evidence that I had been near one.
Macro underwater photography does not start with the camera. It starts with learning to slow down enough to see what is actually in front of you, and then building the technical foundation to capture it deliberately rather than by luck.
Why Use a TG Camera
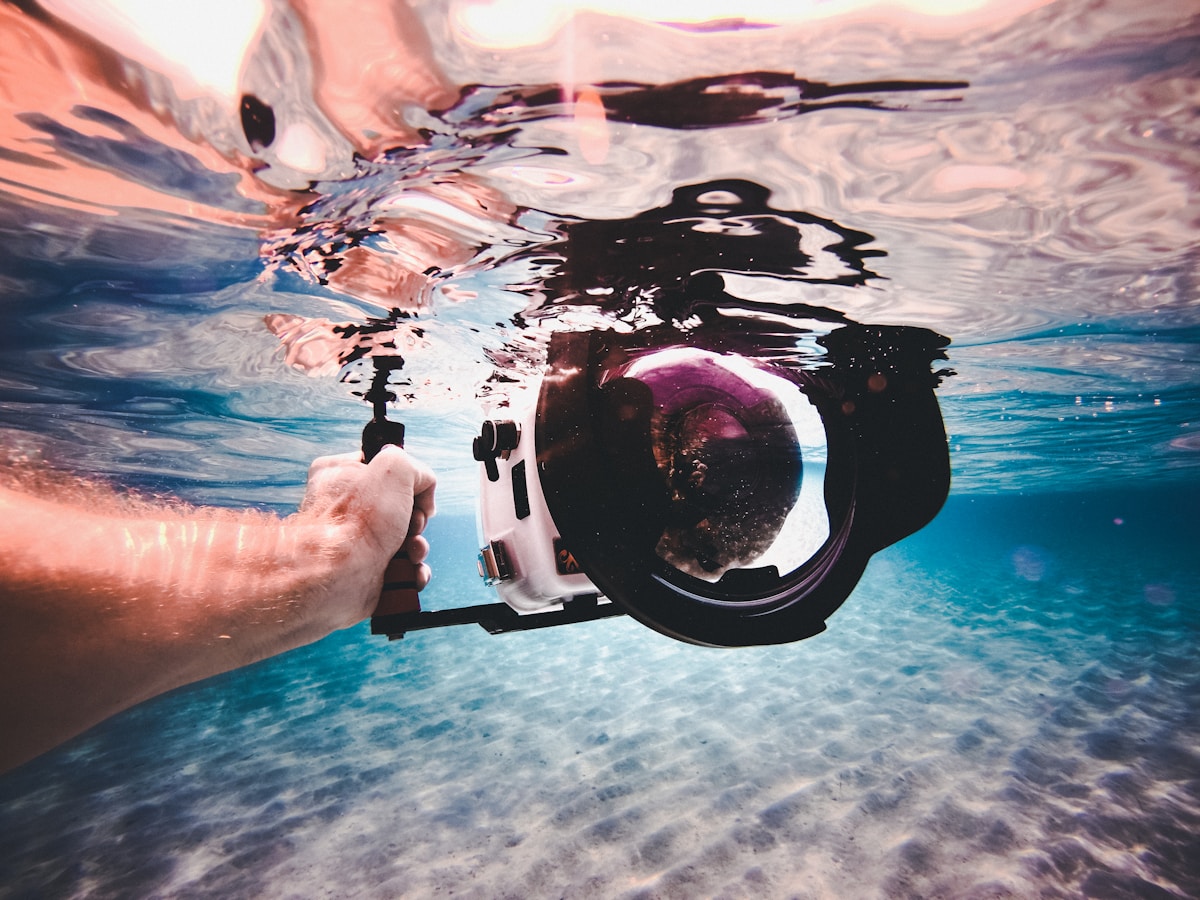
If you have been on a dive boat in the last decade, you have probably seen at least one diver carrying an Olympus TG. The reason is simple: the TG is the closest thing the underwater compact market has to a standard. Waterproof to 15 metres out of the box, designed around close-focus capability, and a price that does not require a second mortgage. The 15-metre rating is real, but I always dive the camera inside its dedicated housing, which is rated to 60 metres. The housing protects an investment you will lean on for hundreds of dives, and it puts the operating ceiling well past anywhere recreational divers go.
Most underwater photographers I know started with an action camera. I did too. A GoPro or equivalent is a great first camera underwater: light enough to carry on every dive, simple enough that you can use it without breaking flow, and the cheapest way to find out whether you actually want to take pictures down there. It also teaches you to dive with something in your hand, which for most divers is the first real lesson in buoyancy. Every time the camera nudges out of frame, the problem is you, and you learn to fix it. The TG is the camera you move to next: macro, manual control, and the option to grow into a real lighting setup, in something that still travels in a pocket. It is not the most powerful camera underwater. It is the most accessible serious one, and that is why it shows up so often.
Why the TG-6 (and Why the TG-7 Is Not a Reason to Upgrade)
The Olympus TG-6 is not an entry-level camera that happens to work underwater. It is a purpose-built imaging tool that excels at one specific thing: getting extremely close to small subjects and producing sharp, well-exposed images of them.
The TG-7 exists. I have not upgraded. The colour processing is marginally improved and the processor is slightly faster, but in the water, doing macro, the two cameras are functionally the same. If you already have a TG-6 and are wondering whether the TG-7 justifies the cost, the honest answer is no. If you are buying new, the TG-7 is the current model and the one to buy. But do not let anyone make you feel underequipped with a TG-6. The limiting factor in your macro photography is not the sensor generation.
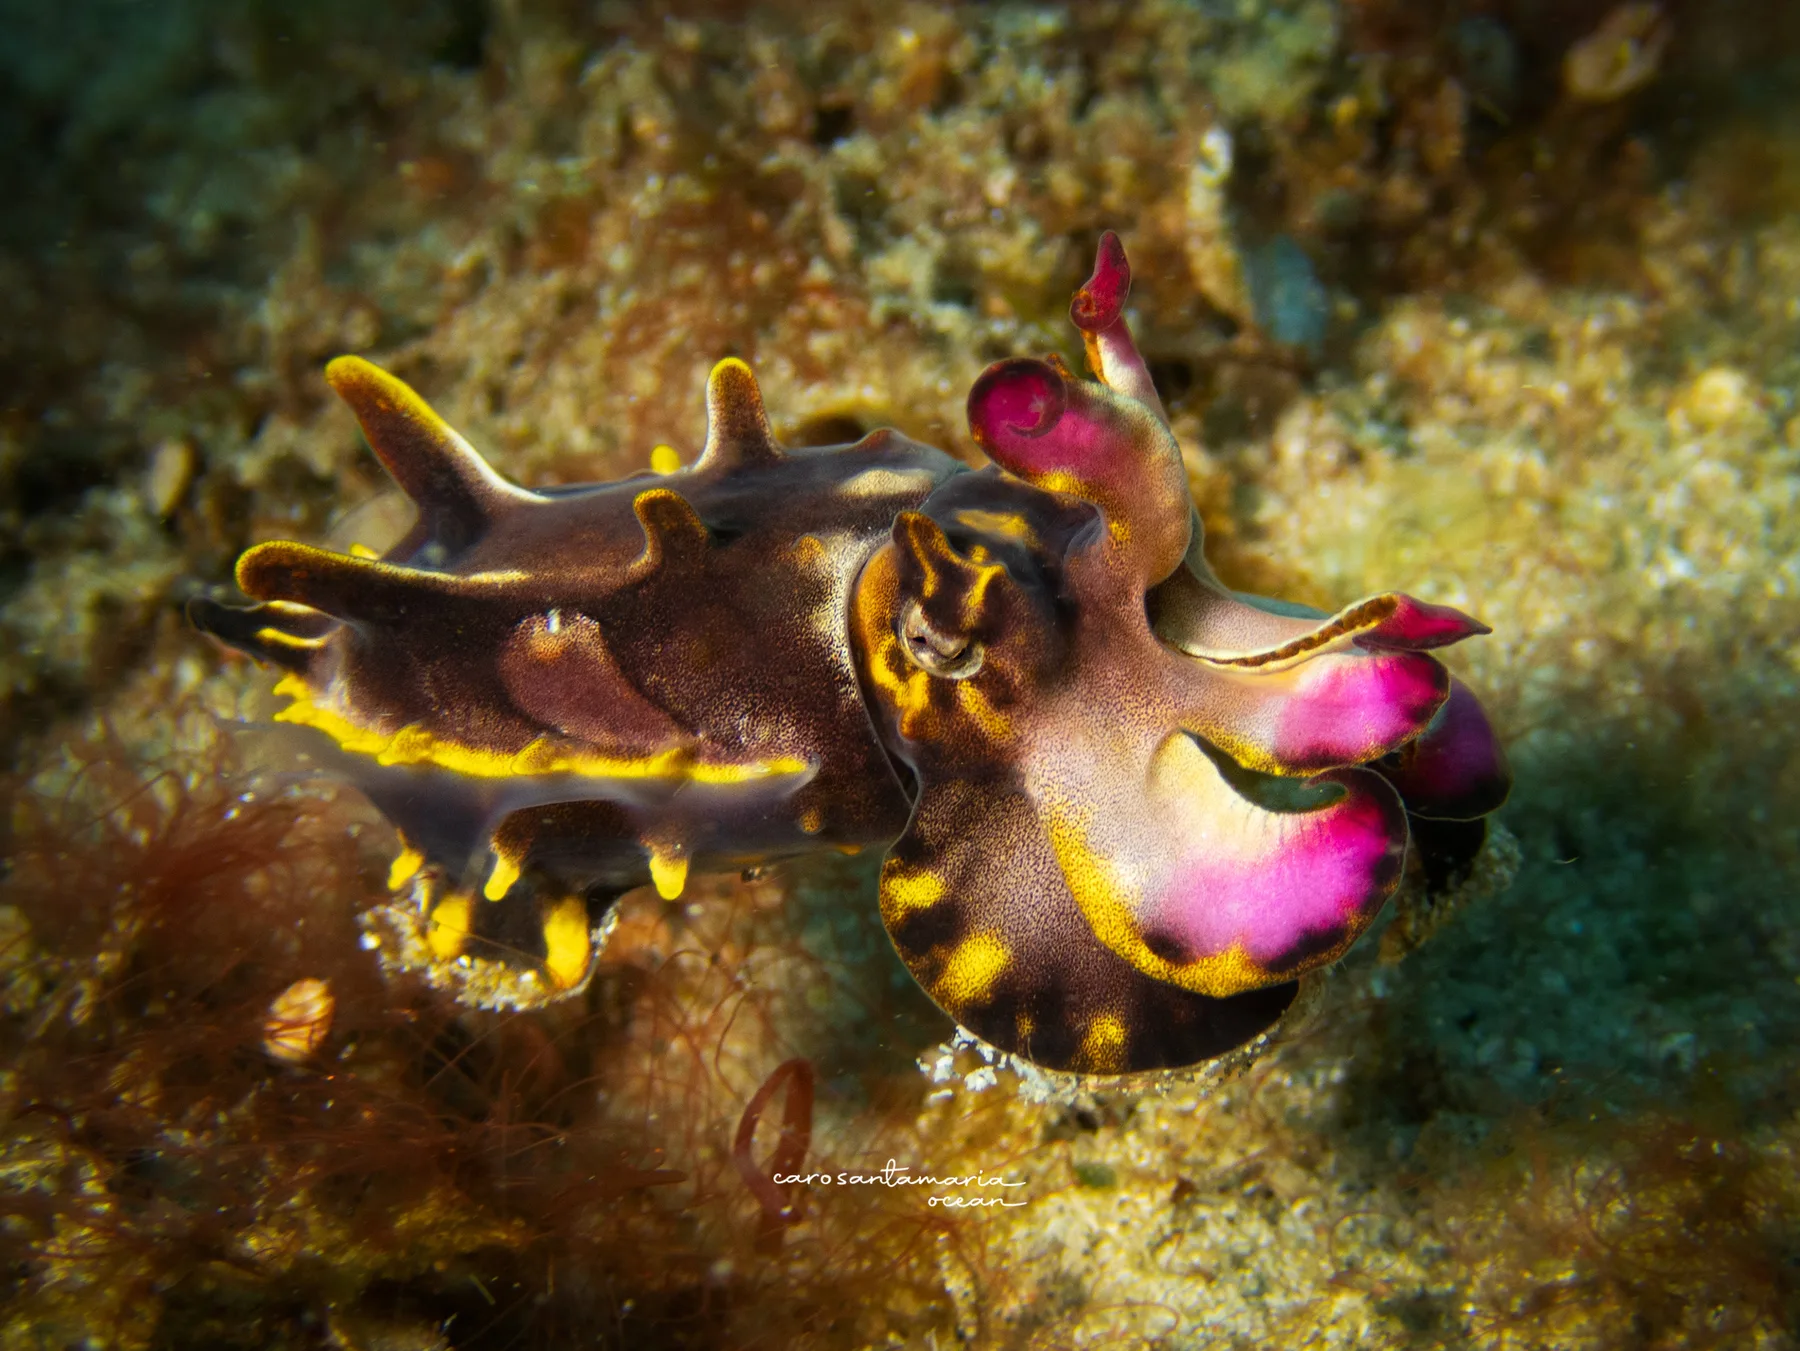
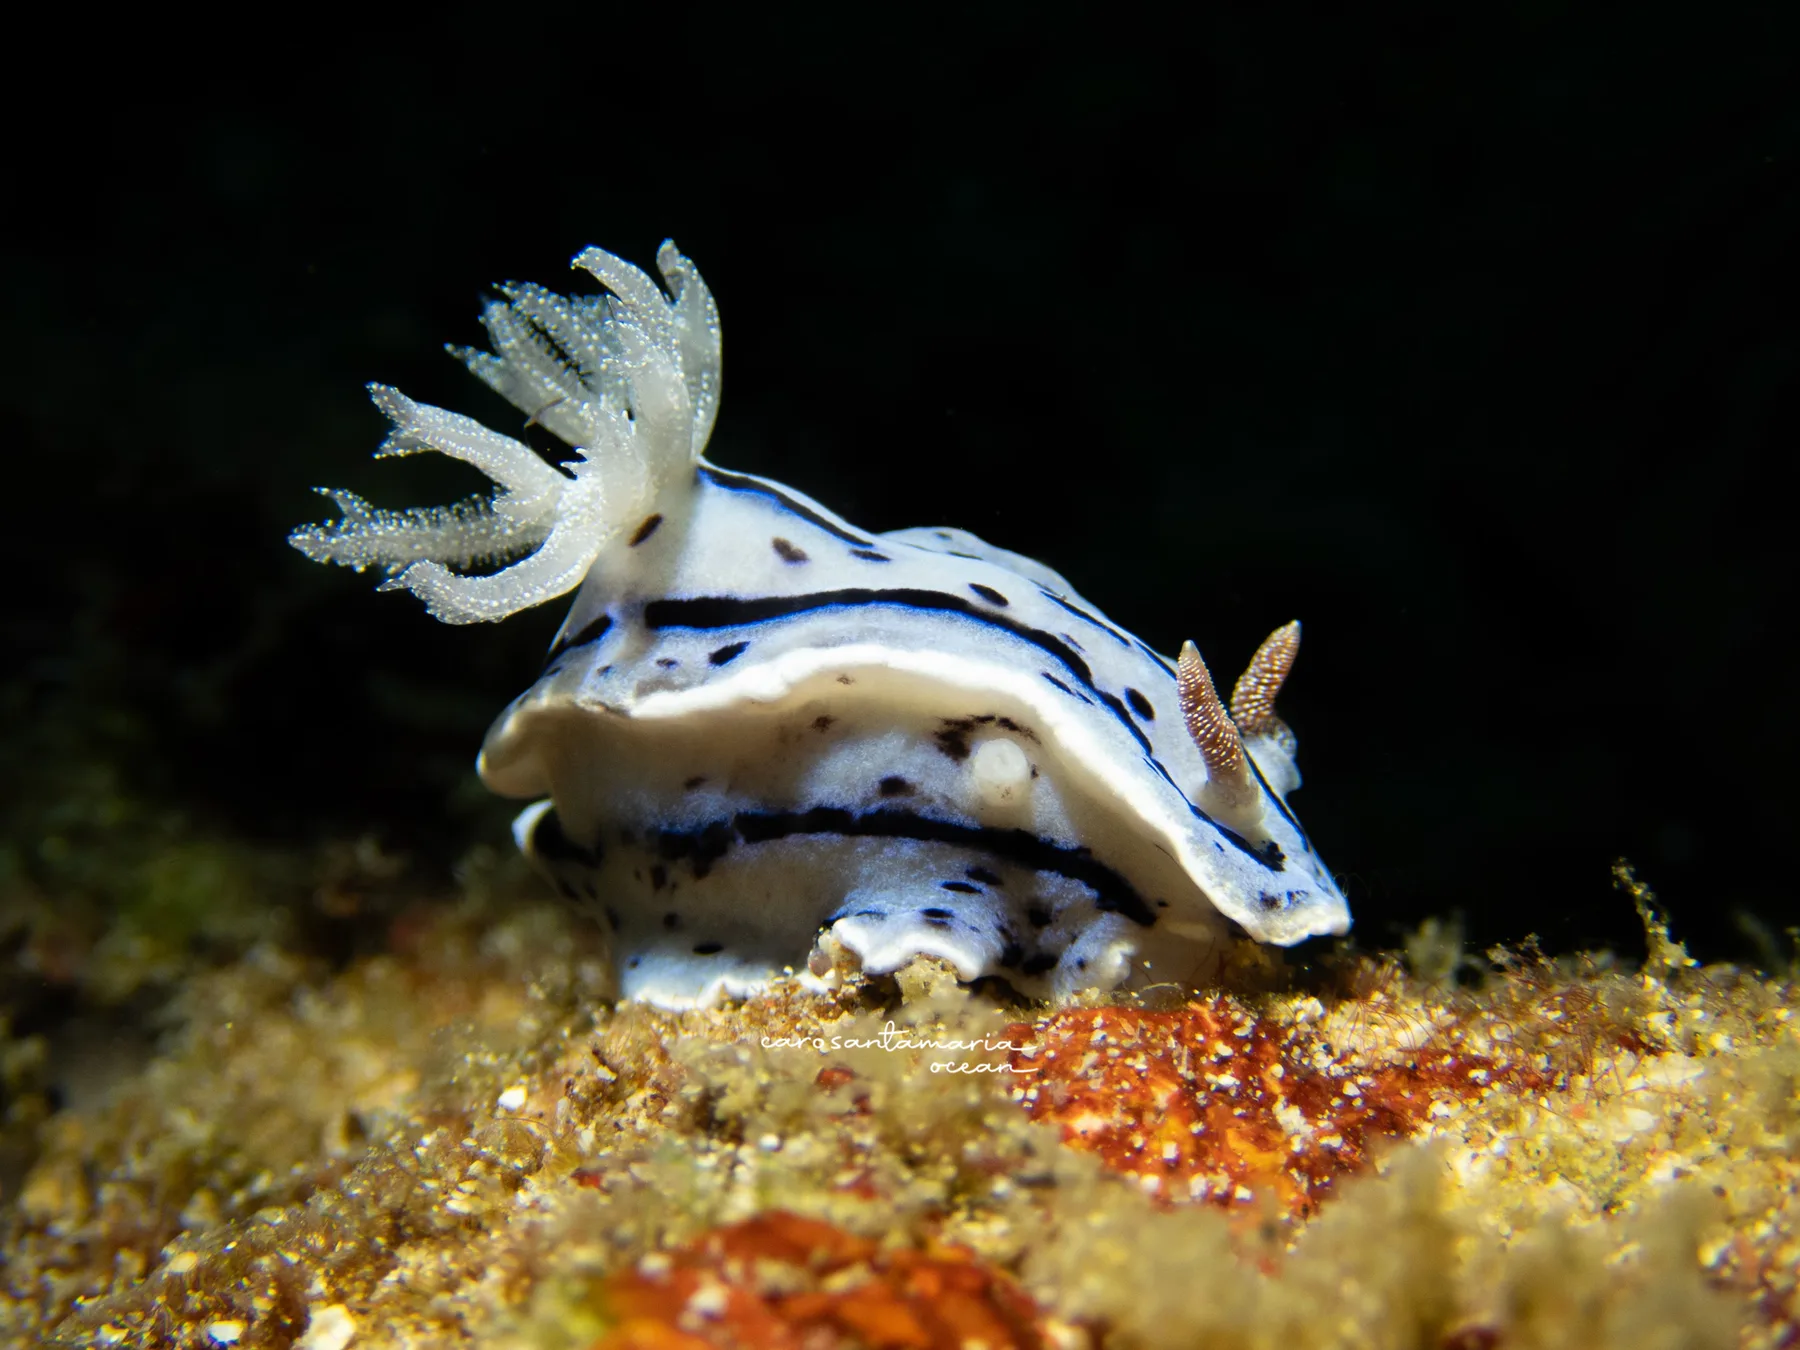
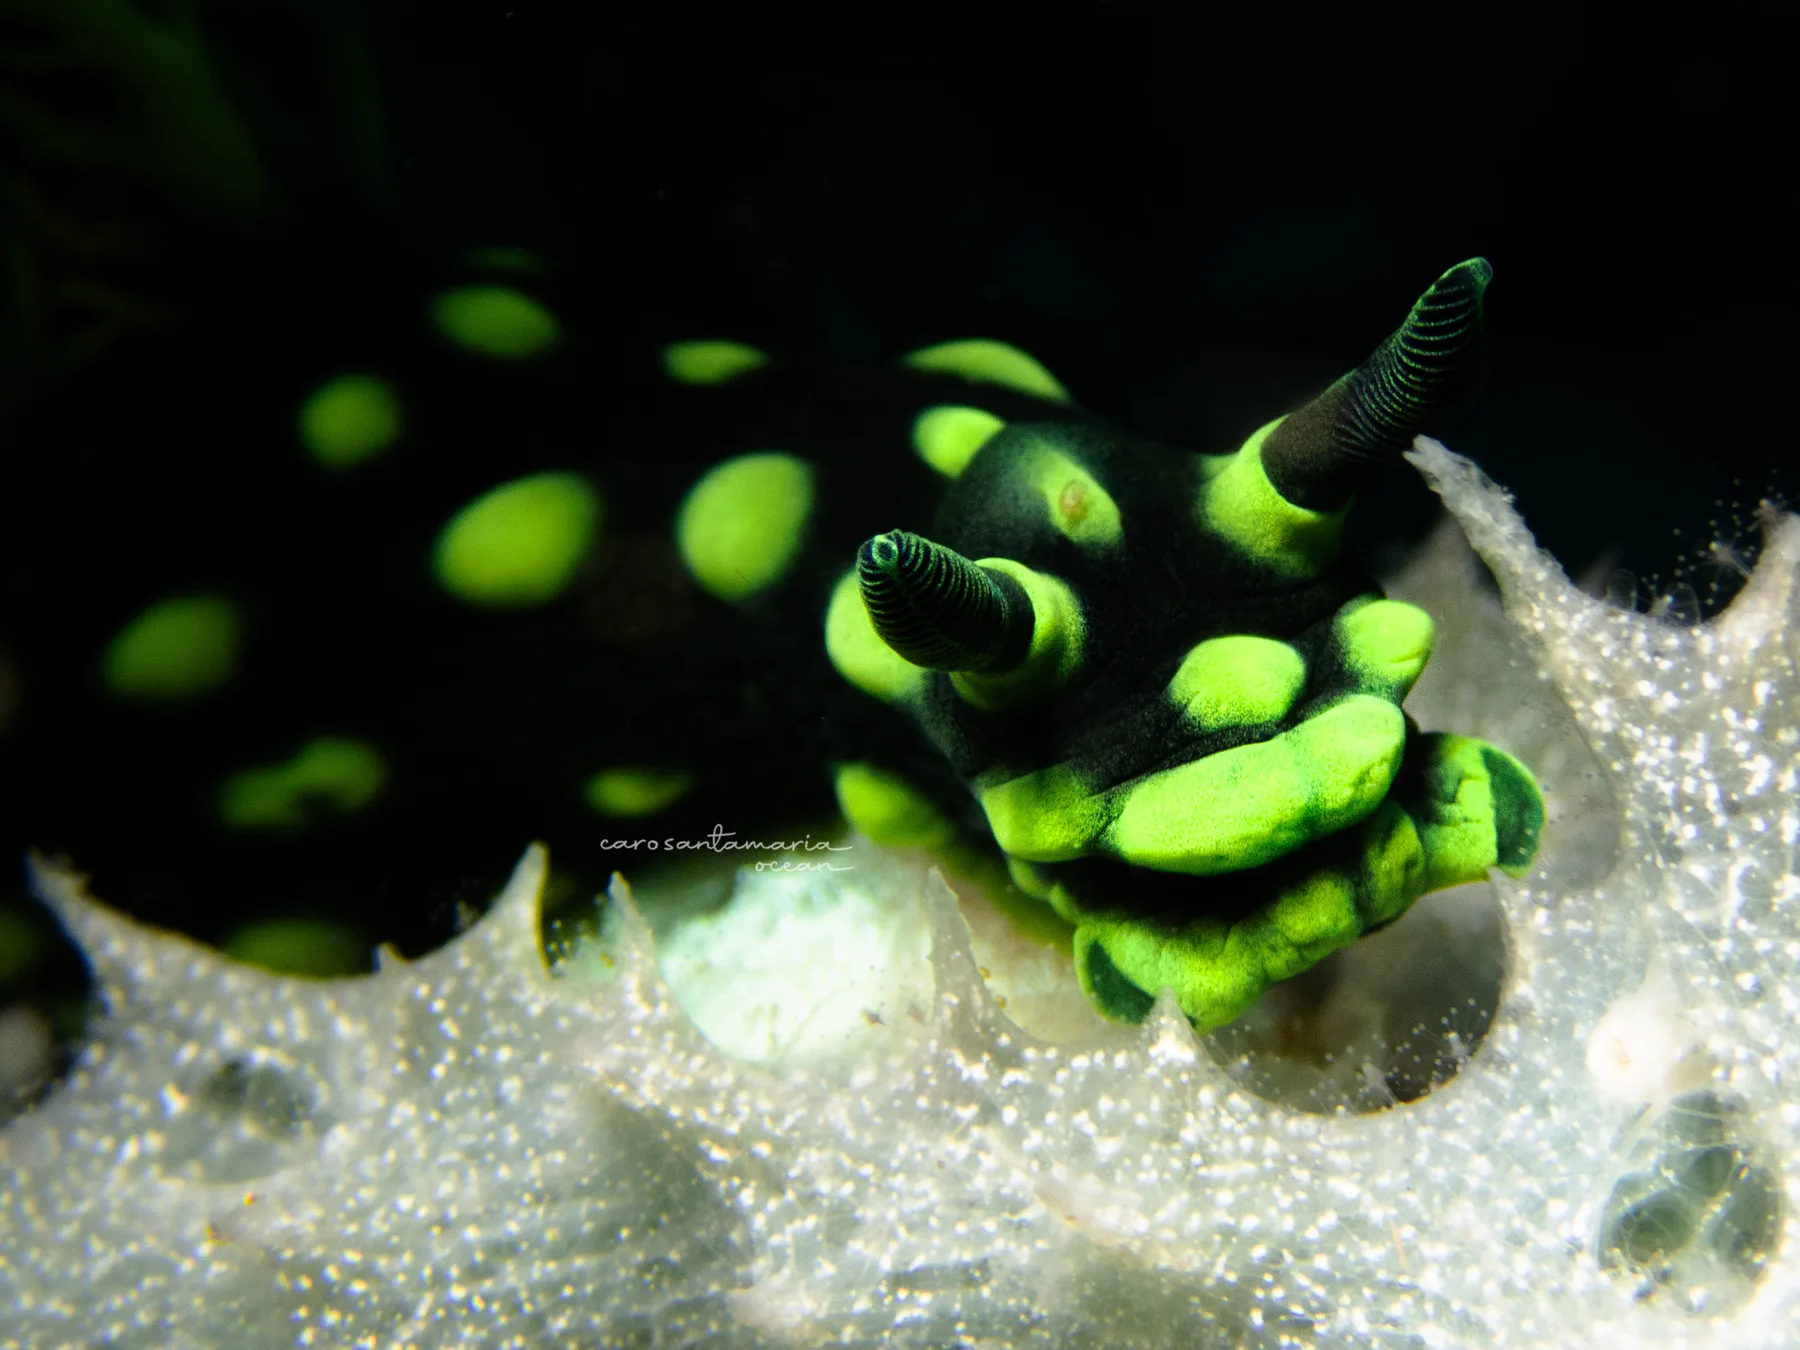
The reason the TG series works for macro is its close-focus capability. The camera can focus at 1 centimetre from the front of the lens, with a magnification ratio that no other point-and-shoot matches. A nudibranch rhinophore, a shrimp antenna, a coral polyp at full extension: these are not things you can photograph properly with a wide-angle action camera. With a TG at one centimetre, they fill the frame.
That close-focus capability is reachable from more than one mode on the dial. Microscope Mode is the obvious entry point and the mode that gets credit for the camera’s macro reputation. Aperture Priority with Super Macro autofocus selected gets you the same one-centimetre range, with the added control of choosing your aperture. Most accomplished TG shooters live in Aperture Priority. Microscope is the famous mode. Aperture Priority is the workhorse.
Both cameras fit into the OM System housing designed specifically for the lens geometry. That housing is the right choice over third-party options.
Best Settings
The TG-6 has more modes than most divers will ever use. The two that matter are Underwater Microscope and Aperture Priority. I started in Underwater Microscope. More often than not, I now shoot Aperture Priority.
Underwater Microscope mode is the easy entry. The camera focuses at one centimetre from the lens, automatically stacks focus passes to extend depth of field across a tiny subject, and chooses exposure on its own. It produces results that look good immediately, and almost every nudibranch shot I made in the first year of macro work came out of it. The mode hands you sharp, deep-focused images with no real input other than holding the camera still.
One warning: do not zoom all the way to 4x in Microscope Mode, or you will get a dot in the middle of the frame from the digital zoom. Stop at 2x and get close to the subject instead.
Microscope worked fine for me for a long time. What changed, the longer I stayed with it, was that I started to notice what the mode was deciding on my behalf. The aperture is locked to wide open, so I could not stop down for the black backgrounds or the extra depth of field a multi-subject scene wants. The exposure is locked to whatever the meter sees, so a strong off-camera light at close range sometimes blew out a frame the mode would not let me dial back. The focus stack takes a few seconds, and more than once a subject moved partway through one and the camera handed me a blurred composite instead of the single sharp frame I would have got from manual control. None of this makes Microscope wrong. It just means the camera was choosing the picture, and I wanted to choose the picture.
That is why I shoot Aperture Priority for most of what I do now.
Aperture Priority gives the say back. On the TG-6 it lives at the A position on the mode dial. The values you can choose at the wide end are f/2.8, f/8, and f/18. They each do something different:
f/2.8 is wide open. Maximum light, shallowest depth of field, the softest background bokeh the camera can produce. This is the setting for an isolated subject against a cluttered reef wall, when you want the eye drawn to the rhinophores and everything behind to fall away. Focus is on a knife-edge: at one centimetre, depth of field at f/2.8 is millimetres.
f/8 is the middle of the range and the most generally useful aperture for macro. You get enough depth of field to keep a moving subject sharp from front to back, with backgrounds that still separate but do not collapse into bokeh. Most of my serious macro work sits here.
f/18 is the one that surprises people. It is not actually a smaller aperture: the TG-6 engages a built-in ND filter at this setting and the optical aperture stays open. What you get is longer shutter speeds and less ambient light reaching the sensor. Paired with a strong off-camera video light, this is the setting that produces the deep black backgrounds that make a coloured nudibranch look like it is floating in space. It is the setting for the dramatic shot. It is also the setting for difficult lighting situations where you want the subject lit by your light alone and nothing else.
The other thing aperture priority preserves: super-macro autofocus. You do not have to be in Microscope Mode to focus at one centimetre. The camera will do it from A mode with Super Macro AF selected. Same close focus, same magnification, with the trade-off of losing automatic focus stacking. For most subjects I find the focus stack unnecessary. A well-chosen aperture and good buoyancy produces a single frame that is sharp where it needs to be.
Beyond the mode dial, a few settings I leave fixed:
- Flash off, always. The built-in flash is set to auto by default. Turn it off and leave it off. At one centimetre it lights the wrong things, produces backscatter from suspended particles, and washes out the subject. Your off-camera lights do the work.
- ISO 100 to 400 for stills, no higher than 800. The TG-6 sensor noise climbs fast above that and you cannot rescue it in post.
- White balance auto when shooting with strong continuous lights. The lights restore the colour the water absorbs and Auto WB handles the rest. If you are shooting ambient-only at depth, which you should not be doing for macro, WB1 to WB3 by depth is the manufacturer guideline.
- RAW + JPEG if you have storage to spare. JPEGs are fine for posting. RAW gives you headroom for the edits you will want to make later, when you understand what good macro looks like and what bad macro looks like.
Backscatter publishes a more complete settings guide that goes deeper into the menu options. The basics above are what I actually use day to day, not the maximum menu tour. Start in Underwater Microscope to learn the lighting and the buoyancy. Move to Aperture Priority once those are working.
Worth saying: these are my personal recommendations, what I like and what has worked for me. Take that as you will.
The Lighting Problem
Water absorbs colour with depth. By 10 metres, most of the red spectrum is gone. By 15, images are blue-green and flat regardless of camera quality.
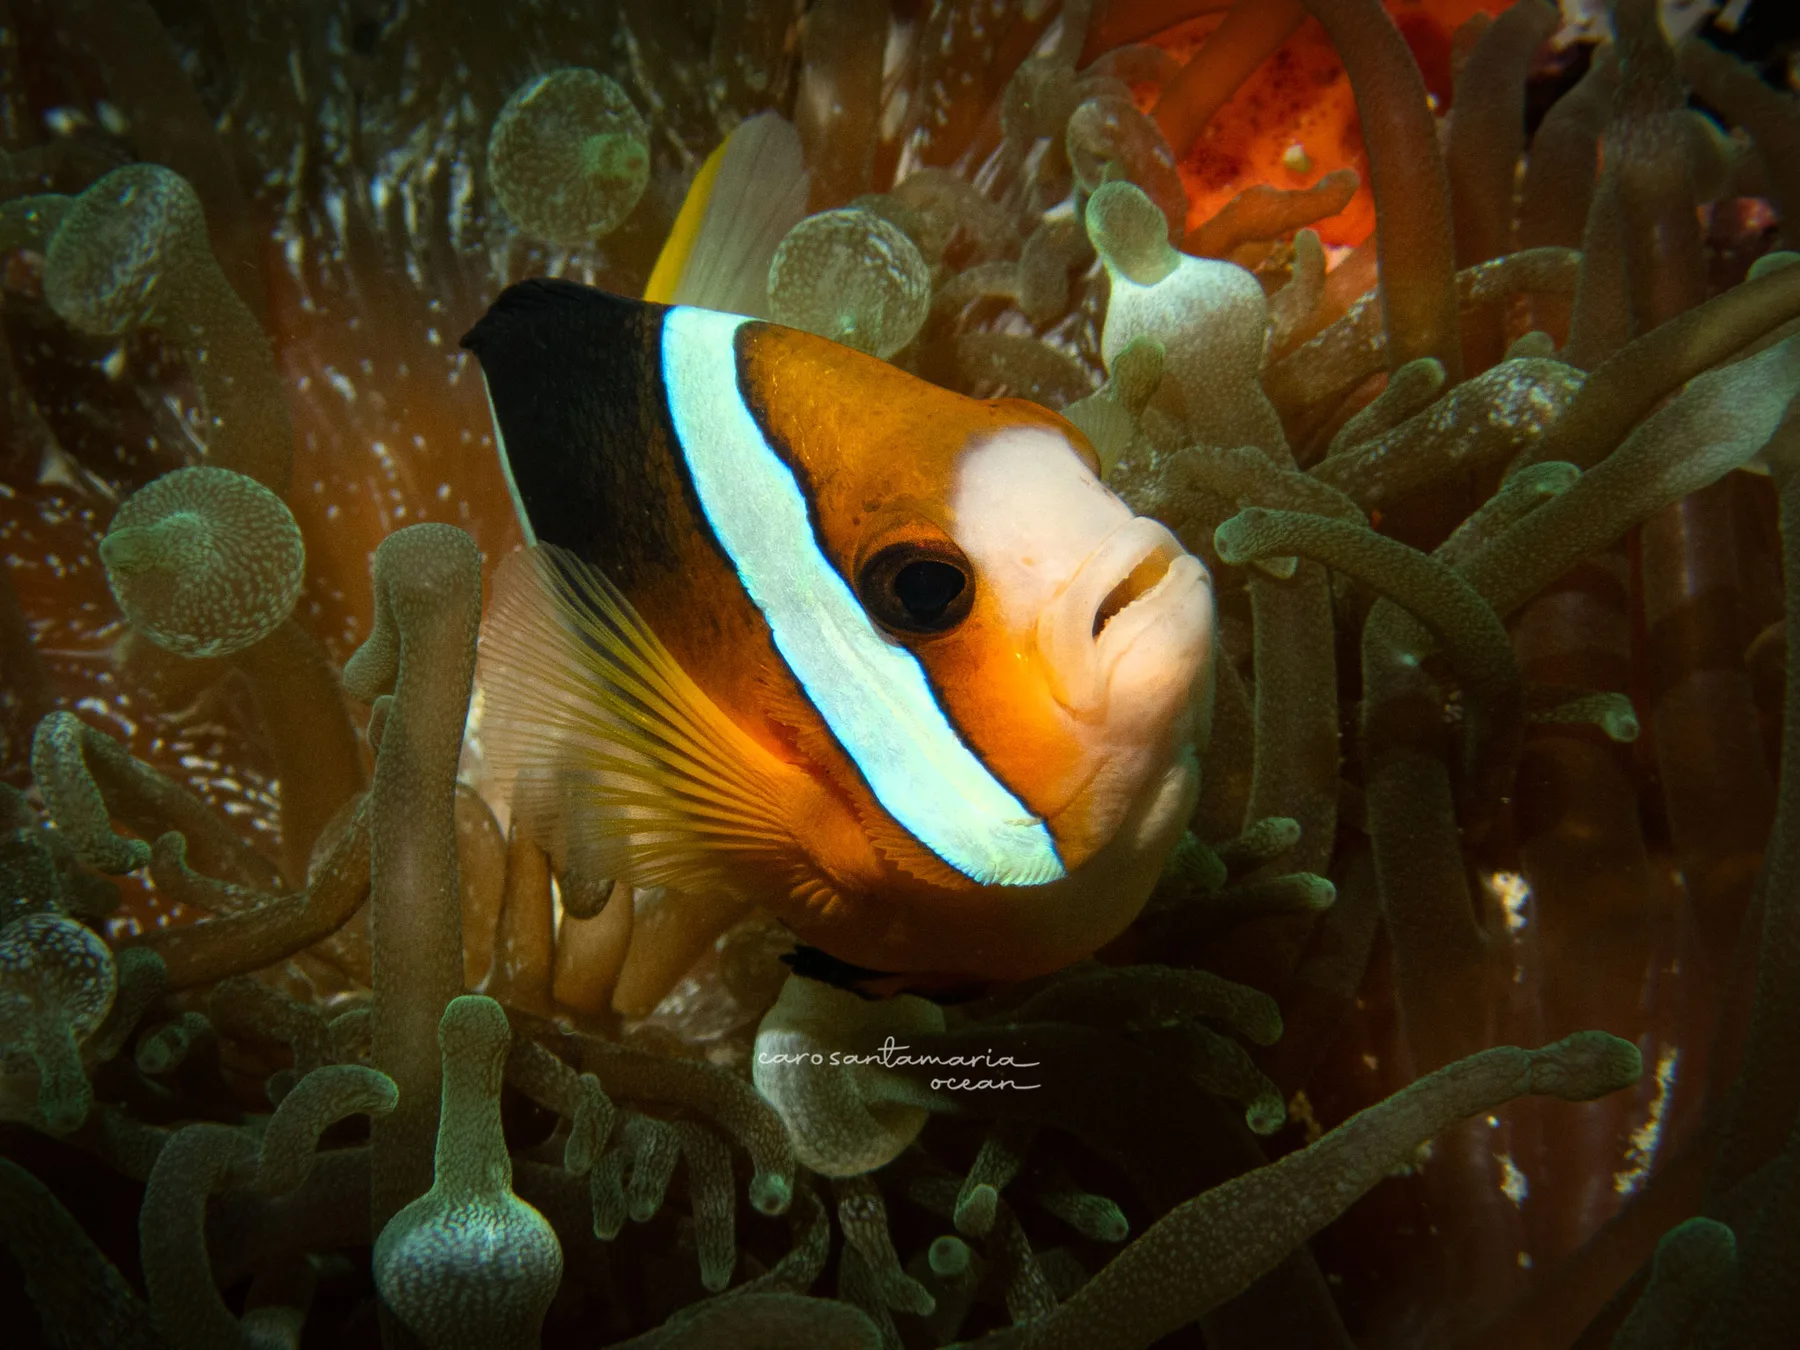
Macro subjects live in places with structurally limited light even in shallow water: under ledges, inside sponges, tucked into crevices, on the shaded underside of coral heads. Macro photography without a dedicated light source produces images that are dim, colour-stripped, and flat. A light positioned correctly restores full-spectrum colour and reveals the texture and detail that ambient light strips away. This is not optional for serious macro work. It is the difference between a record shot and a photograph.
Dive lights are not cheap, and budget can be a real constraint. If you only have the camera, work with the white balance settings and the built-in flash while you learn the basics. The early images will not be portfolio shots, and they do not need to be. The point at this stage is to get comfortable underwater with a camera in hand. You will know when you are ready to invest in a dedicated light, and the camera will tell you, because you will start running into the limits of what it can do on its own.
Backscatter Macro Wide 4300s
Sometimes I dive with two Backscatter Macro Wide 4300 video lights. The 4300 is a continuous light, which means you see the effect of the lighting in real time before you shoot. For macro, this matters more than it does for wide angle. When you are 1 centimetre from a subject that may move at any moment, you do not have time to adjust and reshoot. You need to see the light falling correctly before you commit.
Two lights give you control over shadows. A single light from one side creates dimension but produces a hard shadow on the other. Two lights, positioned asymmetrically, give you the ability to fill that shadow or deepen it depending on what the image needs. With a pair of 4300s you can light a nudibranch the size of a thumbnail from two angles simultaneously, or swing both lights to one side for dramatic side-lighting that makes texture visible in creatures most people have never looked at closely.
The colour rendering at full power is accurate enough that images need minimal white balance correction in post. That matters when you are shooting hundreds of frames across a week of diving.
The Mini Flash Option
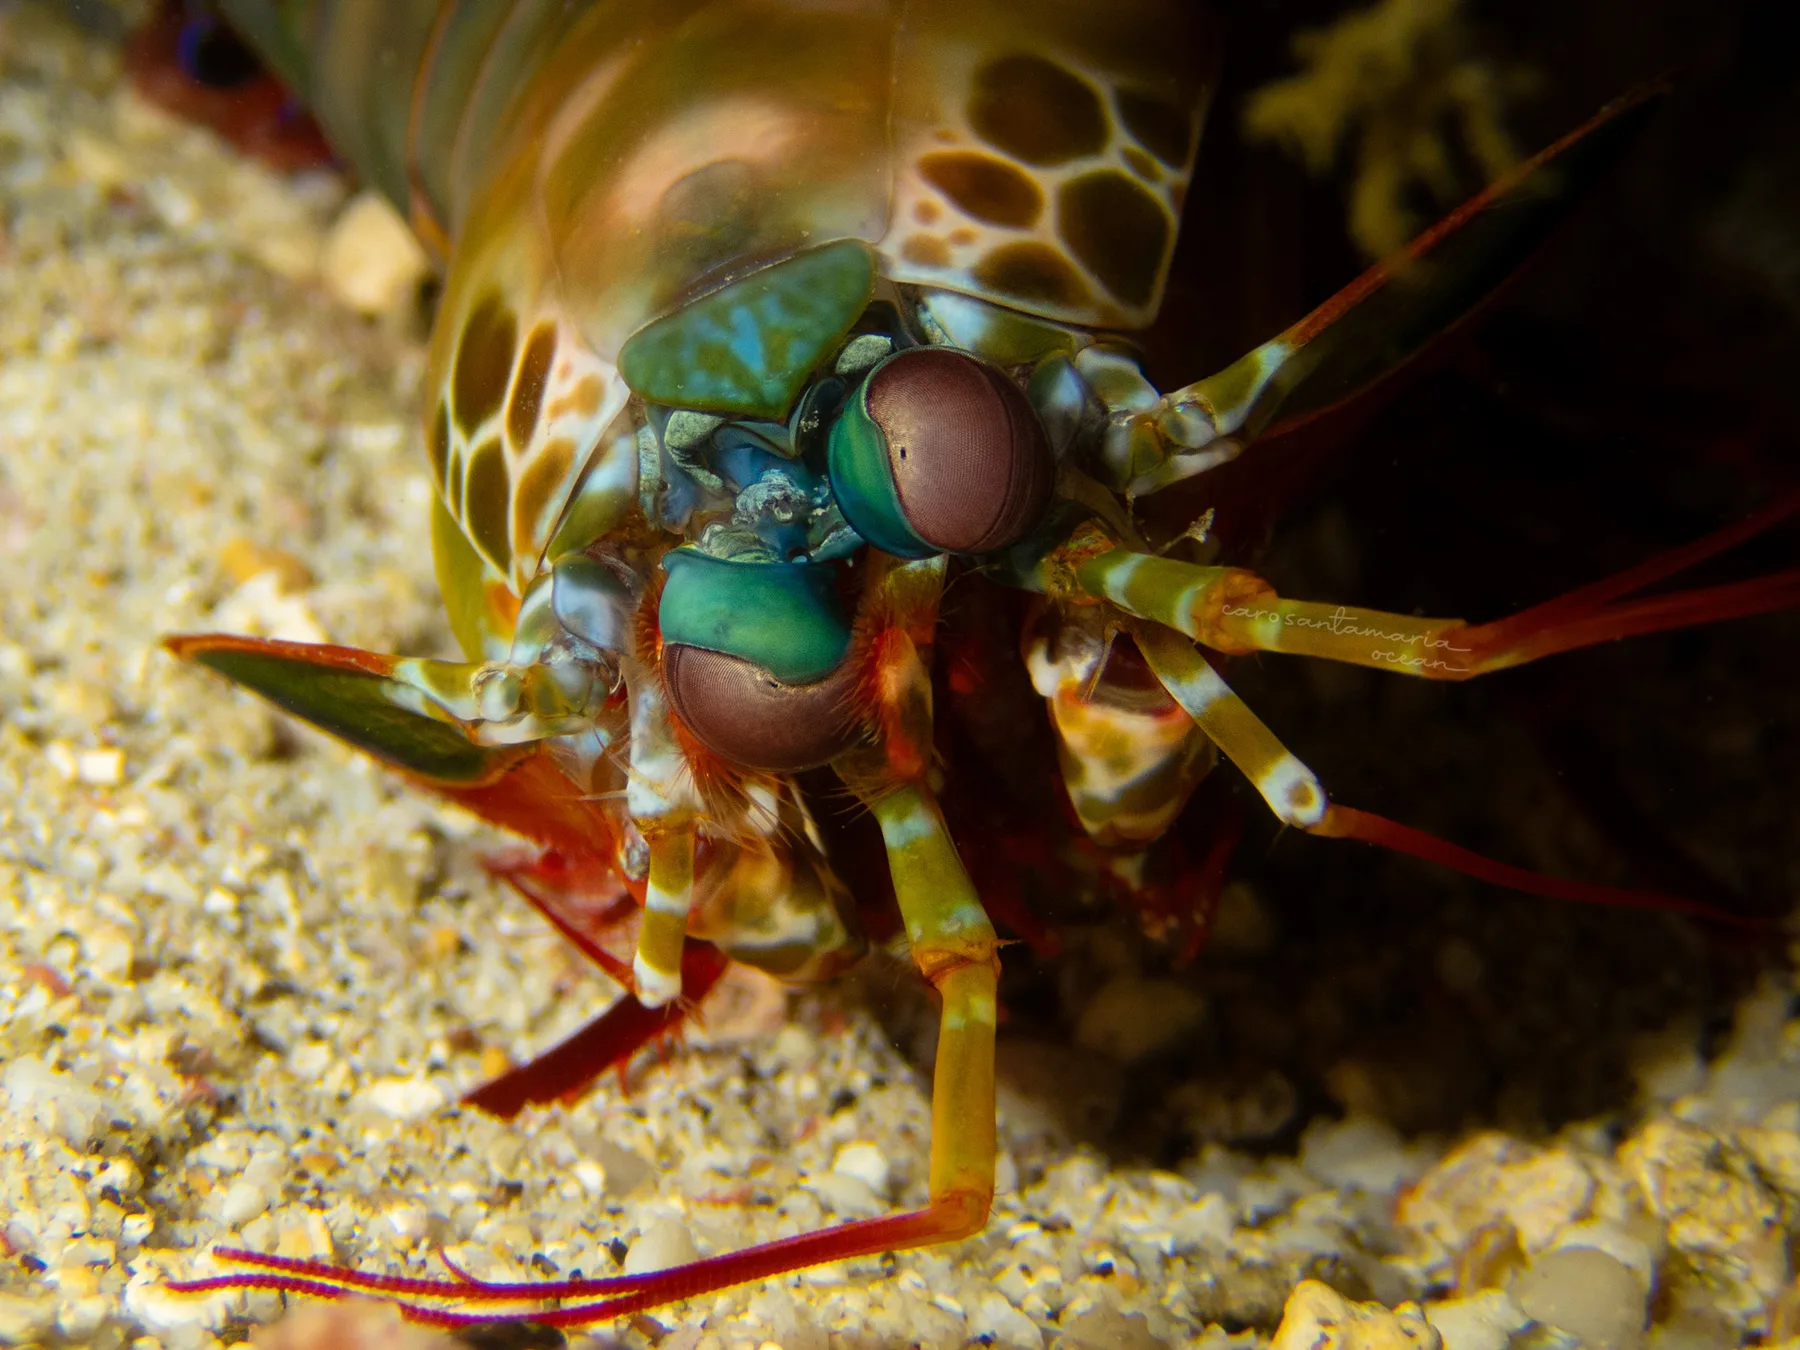
The Backscatter Mini Flash is the other light worth knowing. Where the 4300 is a continuous video light, the Mini Flash is a strobe. It fires a burst on every shot rather than staying on. The tradeoff is real: you lose the live preview of where the light is falling, which matters a lot when you are 1 centimetre from a subject that may move. What you gain is a harder, more defined light with a sharper falloff. That quality suits highly textured subjects (the cerata of a nudibranch, the armour of a mantis shrimp, the skin of a rhinopias) and produces deep, clean separation from dark backgrounds that video lights can struggle to match.
I use video lights because the real-time feedback fits the way I dive. But the Mini Flash is a legitimate choice for macro, and for photographers who are already used to strobe timing, the results can be exceptional. It is also small enough that it does not change the packability of the setup at all.
The Handheld Technique
I often dive without a tray. On many dive sites a tray is impractical: the penetration is too tight, the subject is under a ledge that requires a specific approach angle, or the reef demands a flexibility that a rigged setup cannot provide.
Handheld lighting is a skill. It takes time to develop the muscle memory for positioning a light at exactly the right angle while simultaneously framing a subject 1 centimetre from the lens and controlling your position in the water. It is also, once mastered, faster and more responsive than any rigged setup. You can change the lighting angle between shots in a fraction of a second. You can follow a moving subject across a rock face and adjust the light in the same motion without fighting a tray against the current.
The technique is to treat the light hand and the camera hand as independent instruments working together. The camera hand frames. The light hand sculpts. Neither is subordinate to the other.
Stop Hoping. Start Creating.
The biggest shift in macro photography is moving from reactive to intentional shooting. You will hear people call the Olympus TGs “point and shoot” cameras, which reduces them to an “anyone can do it” tool. In reality you can point and shoot as much as you want, but if you want results that make you proud, you need to learn the camera, the settings, the lighting, the environment, and the behaviour of the subject. There is only one way to get there: practice.
Most macro photographers swim until they find something, point the camera at it, and hope. The results are inconsistent because the process is inconsistent.
Intentional shooting means understanding before you press the shutter what you want the image to look like. Where is the light coming from. What is the background doing. Is the subject isolated against something that draws the eye toward it, or competing with it. A black background created by positioning the lights correctly. A soft bokeh separating a tiny shrimp from a cluttered reef wall. A single angle of light catching the texture of a nudibranch cerata. These are choices, not accidents. The camera records them. You make them.
Fewer shots, slower. Adjust the light before shooting, not after. Find the background that serves the image before framing the subject.
Buoyancy Is the Whole Game
At 1 centimetre focus distance, depth of field is measured in millimetres. Any movement, a breath held wrong, a slight current, a fin kick that was not quite controlled, and the shot is gone. The subject did not move. You did.
This is why buoyancy is not a prerequisite for macro photography. It is the skill macro photography is built on. The photographers who consistently produce sharp, composed, well-lit macro images are not the ones with the best cameras or the most powerful lights. They are the ones who can hover motionless at any depth, in any current, for as long as the subject requires.
It also means you do not disturb the reef. A diver with poor buoyancy does damage: to the coral, to the animals, and to the shot. A diver with real control moves through the water without leaving a trace. The macro subjects that most divers never see are visible to the divers who are calm enough and still enough to earn them. A well-fitted BCD is part of that foundation. The stability you need for macro depends directly on having the right buoyancy equipment.

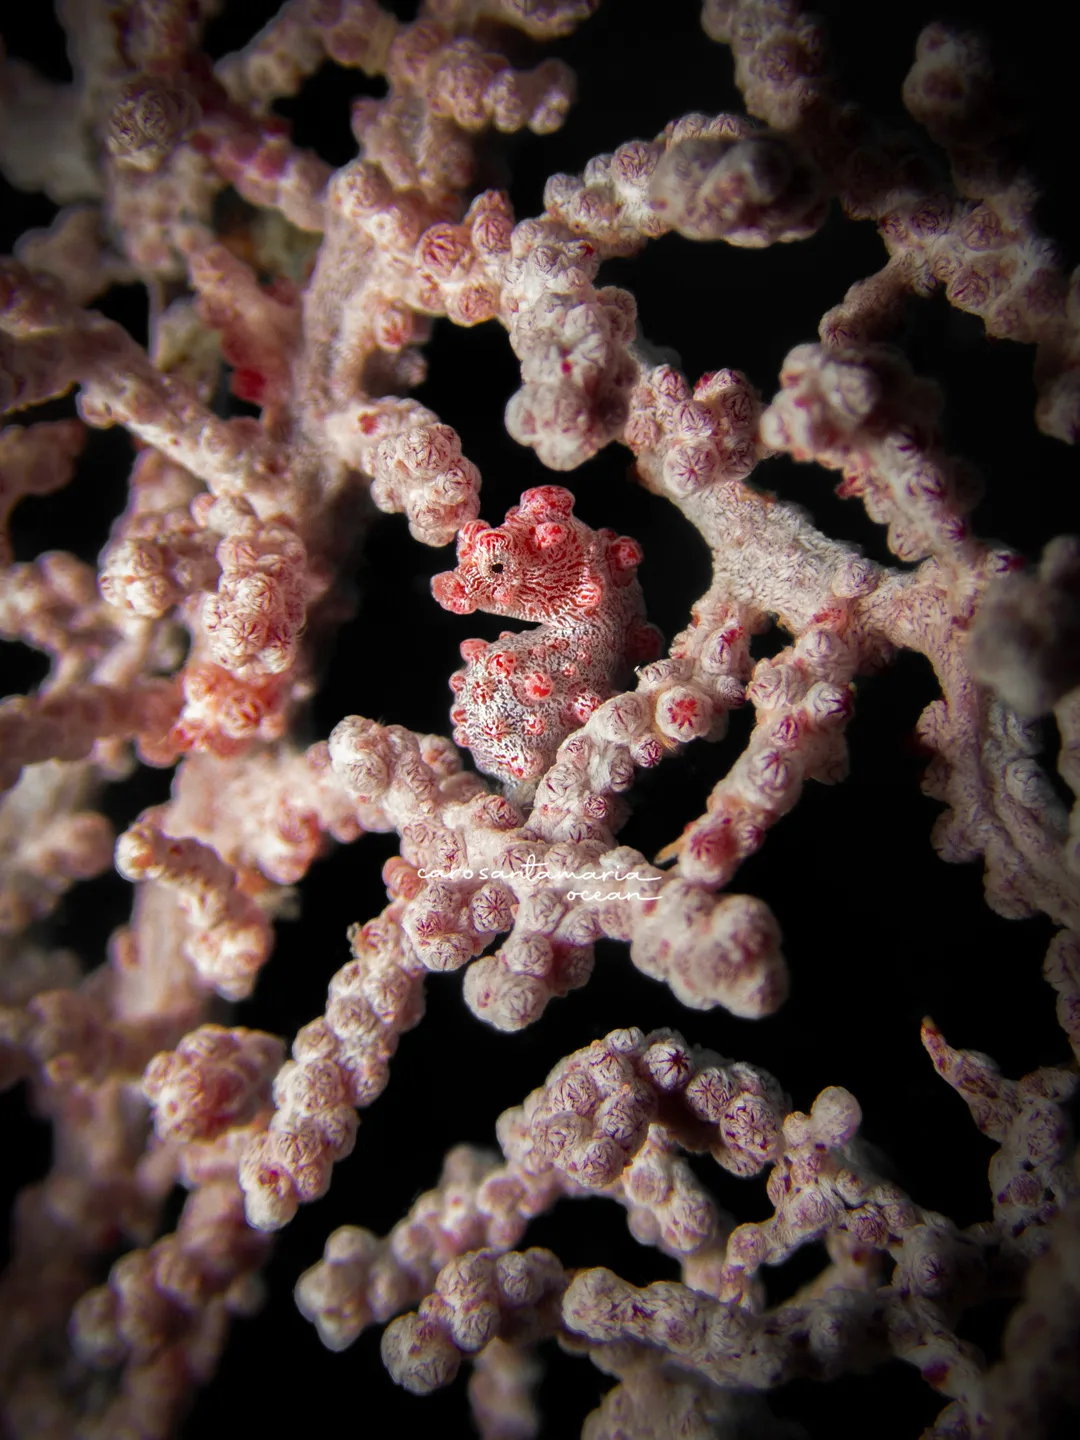
Where to Find Macro Subjects
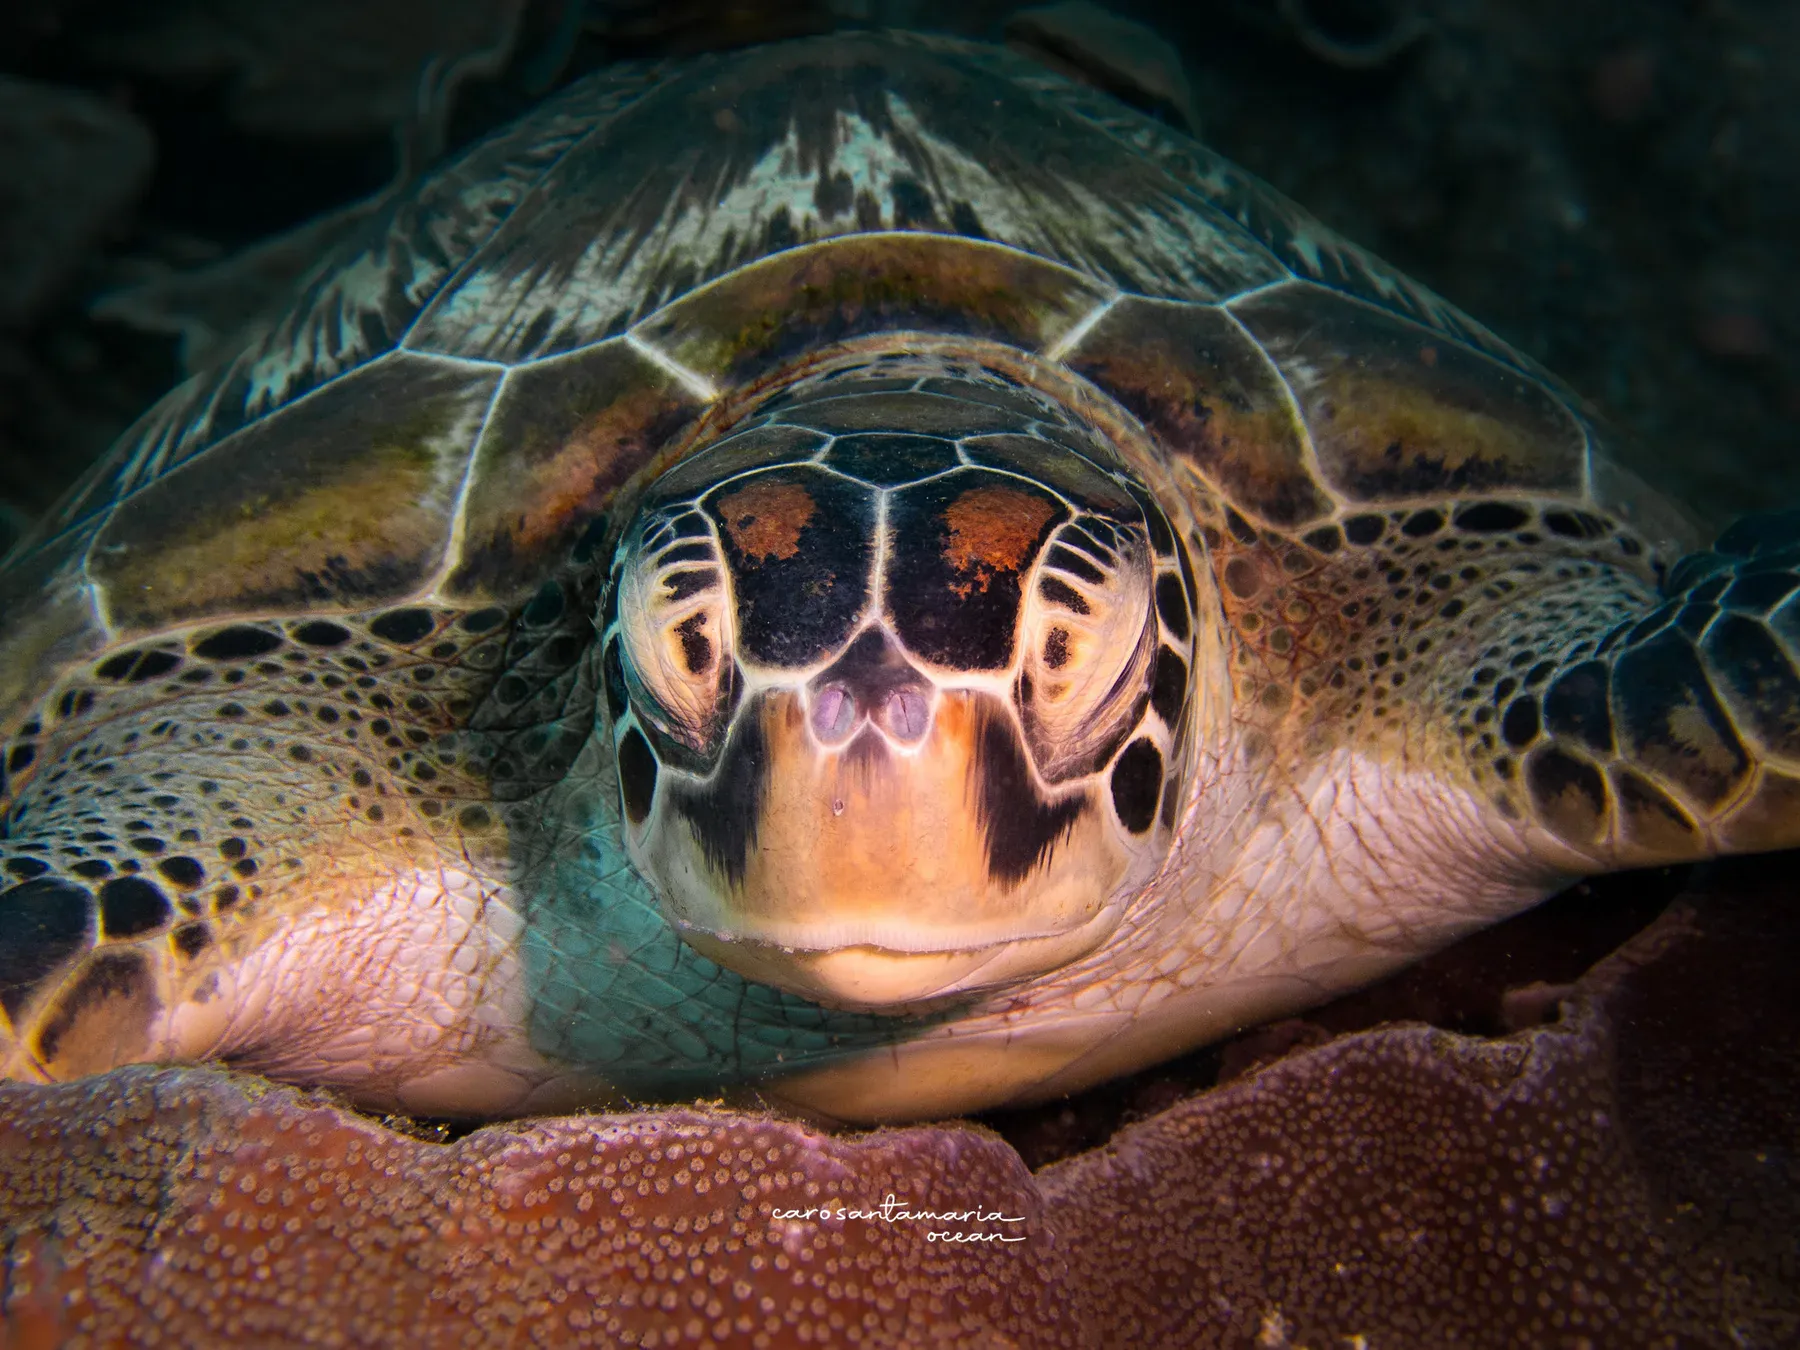
The reef you think you know is hiding things. Nudibranchs live under ledges and on the undersides of coral heads. Pygmy seahorses live on specific species of fan coral. Frogfish sit motionless on sponges that match their colour exactly. Hairy frogfish look like algae. Rhinopias look like nothing at all until they move.
The rule for macro is: look down and slow. Check the undersides of things. Look at what is attached to what. Night dives expand this considerably. Animals that hide during the day come out after dark, and the reef becomes something else entirely. A good dive torch is essential for low-light macro work, both for illuminating subjects in crevices and for the sheer number of animals that only emerge after sunset.
For how the TG-6 fits into a broader underwater camera setup, and when to consider stepping up to a compact with a housing and strobes, see the underwater camera guide.
If you like my underwater photography, you can follow me on Instagram.